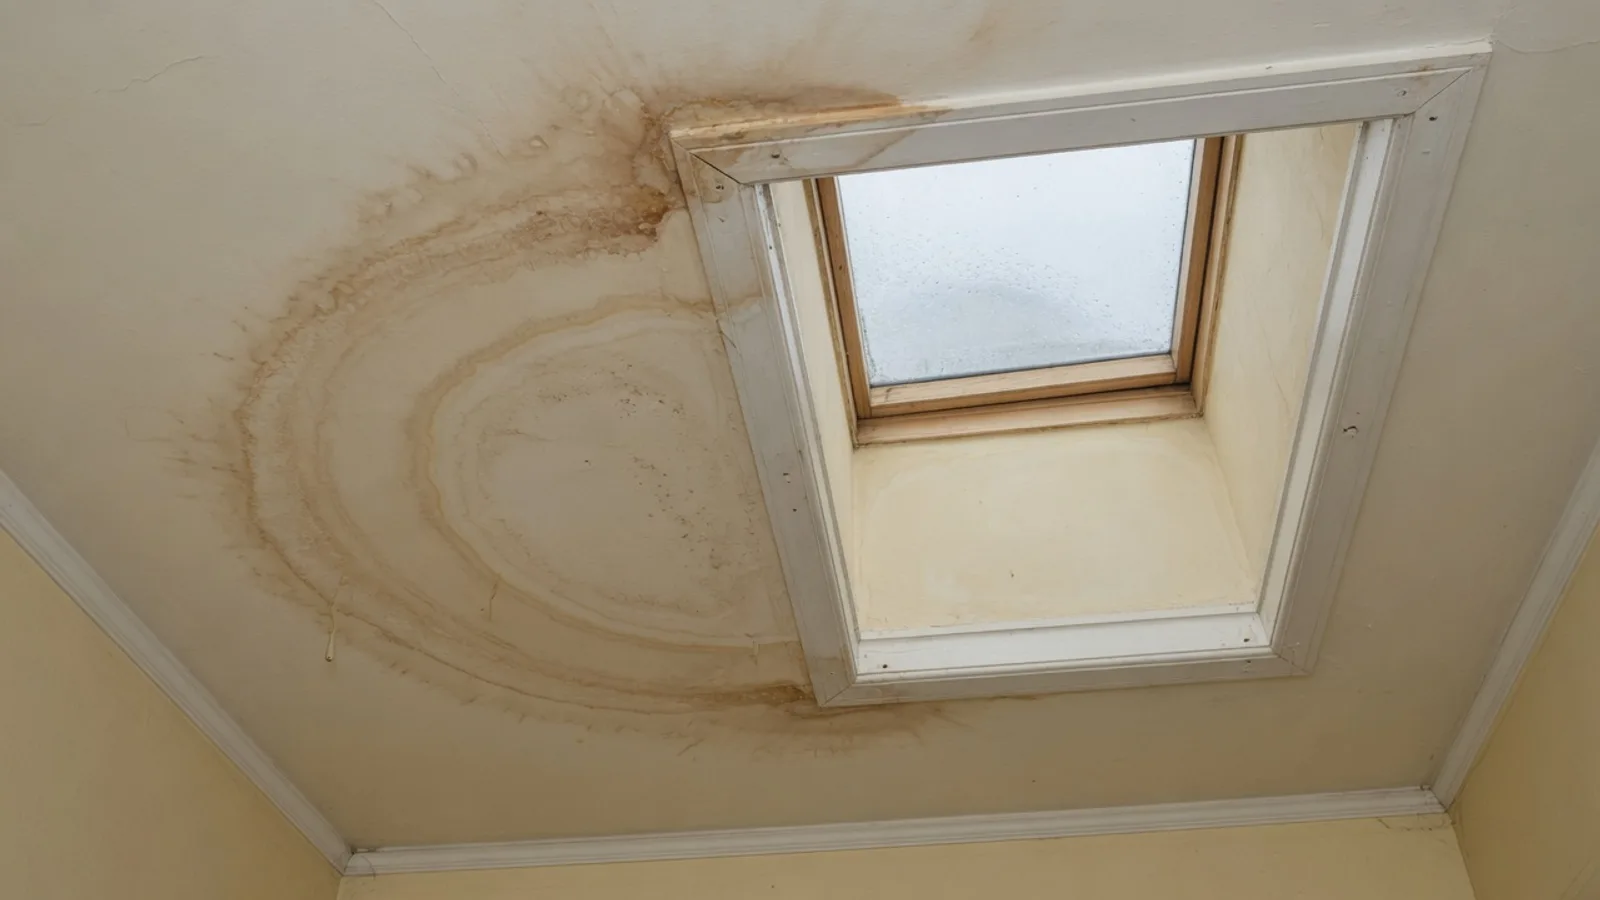
Water appearing below a skylight turns an ordinary rain into an urgent problem. Emergency skylight repair starts with containing the indoor water, recording what happened, and arranging an on-site diagnosis from an independent professional.
Bright Sky ATX is a referral service serving Travis, Williamson, and Hays counties. It matches homeowners with experienced, insured independent local professionals. The homeowner contracts with and pays the professional directly.
What a sudden leak usually means
A sudden drip doesn’t identify its own source. Water near a skylight may be entering at the glazing, frame, curb, flashing, surrounding roof, or another point higher up. It may then appear at a ceiling joint away from the entry point. The precise path can’t be confirmed without an on-site inspection.
Start by noting what you can see from inside. Record whether water is dripping, spreading as a stain, or appearing around one corner. Note whether the skylight pane looks cracked or displaced. Write down when the water first appeared and what the weather was doing at that moment.
Move belongings away from the wet area if you can do so without entering a hazardous space. Place a container beneath an ordinary drip when practical. Don’t treat that step as a repair. It only records and contains what is already reaching the room.
A visible leak also doesn’t prove that the skylight itself has failed. The opening sits within a larger roof assembly. An independent pro needs to examine the unit and the nearby roof before assigning the cause.
Austin homeowners often search for emergency skylight repair during or just after rain. The useful goal at that moment is clear: limit indoor exposure, preserve evidence, and get the leak source checked. Our skylight repair and leak repair service explains how Bright Sky ATX connects homeowners with independent local pros.
For a deeper look at tracing water paths, read the Austin skylight leak diagnostic guide. That guide covers diagnosis in more detail. This page focuses on the urgent decision before work begins.
How to tell flashing failure from broken glass
Broken glazing and a hidden leak path call for different conversations. From indoors or ground level, look for direct visual evidence without assuming the final diagnosis.
A crack, hole, shifted pane, or missing piece points attention toward the glazing assembly. Photograph the whole skylight first. Then take closer images that show the visible damage and surrounding frame. Don’t touch loose material to test it.
Flashing trouble may be less obvious. You may see water at an uphill corner, staining beside the shaft, or moisture that appears only during certain rain conditions. Those observations can guide the inspection, but they don’t confirm that flashing caused the leak.
The roof around the unit matters too. Record visible changes near the opening, including displaced roofing material or debris. A ground-level photo may help the professional plan the inspection. It isn’t a substitute for examining the roof and skylight together.
Avoid deciding that a bead of sealant will solve the problem. The approved claims ledger doesn’t establish one universal repair for an active skylight leak. The correct scope depends on what the independent pro finds on site.
Tell the pro whether the pane visibly changed, whether the frame appears out of position, and where the first indoor mark appeared. Mention whether this is the first leak or a repeat problem. Those details help separate a damaged component from a water path around the opening.
An Austin skylight leak repair should begin with source confirmation. If the pane or insulated glazing appears damaged, the discussion may include skylight glass replacement. If the evidence points elsewhere, the professional can explain which surrounding components need attention.
What to document before anyone opens the roof
Good documentation preserves the condition before temporary or permanent work changes it. Begin with wide photos of the room, ceiling, skylight shaft, and floor below. Then capture close images of stains, drips, cracks, and displaced finishes.
Keep a simple written timeline. Include when you first noticed the problem, whether water was actively moving, and which rooms were affected. Record later changes in separate notes instead of rewriting the first entry. That keeps the sequence clear.
Photograph visible belongings or finishes affected by the leak. Save relevant roof, skylight, remodeling, and insurance documents that you already have. Don’t claim a cause in your notes unless an independent professional has confirmed it. Describe what you observed.
Ask the inspecting pro to identify the suspected entry point and the indoor exit point. Request photos of any area you can’t see from the ground. Ask which components were examined and what evidence supports the proposed repair.
Before anyone cuts or changes a roof opening, confirm which authority has jurisdiction. The answer isn’t always the City of Austin. Cedar Park has its own Building Permits and Inspections office. Its Development Services department reviews building work within Cedar Park.
Leander publishes a permit guidance list, but the city states that list isn’t comprehensive. Skylights aren’t named on it. Confirm the current requirement with a Leander inspector before treating roof-opening work as permit-free.
Kyle Building Inspection issues construction-related permits within Kyle city limits. Its published activities list isn’t comprehensive, and skylights aren’t specifically named. Confirm the proposed scope with that department before work begins.
Mueller is within Austin, but modifications to existing improvements are reviewed in advance through the Mueller Design Book process. Homeowners there should confirm the current modification packet before changing a roof opening.
When repair gives way to replacement
Repair and replacement aren’t interchangeable decisions. A targeted repair addresses a confirmed problem while keeping the remaining assembly. Replacement removes the existing unit and installs another skylight as part of a larger scope.
Replacement enters the discussion when the independent pro finds that a limited repair won’t address the observed condition. That conclusion should come from the inspection, not from the size of the ceiling stain. The approved claims ledger doesn’t provide an age cutoff, price threshold, or universal rule for choosing replacement.
Ask for two clear explanations when both options are possible. First, what exact component would the repair address? Second, what condition makes replacement the stronger option? The answers should connect directly to photos and on-site findings.
If surrounding roof work is already planned, ask how the skylight scope fits that project. Don’t assume every skylight must be replaced whenever a roof is replaced. The decision still depends on the unit, opening, surrounding materials, and proposed roof work.
Within the City of Austin, replacement planning may also involve the residential energy code. Austin uses Climate Zone 2. Its published skylight maxima are U-factor 0.60 and solar heat gain coefficient 0.28 in the cited existing-building and new-construction tables. The independent pro should confirm which current requirements apply to the actual project.
Bright Sky ATX doesn’t set prices or give warranties. The independent professional provides the proposed scope and price. No verified Austin emergency-repair average appears in the approved claims ledger, so a dependable dollar figure can’t be published here. Ask the professional to separate temporary work, permanent repair, glazing, flashing, and replacement items in the proposal.
Read the repair-or-replace skylight guide before comparing those paths. If replacement becomes the selected scope, the skylight replacement service explains the referral option.
How an independent pro confirms the source
A useful inspection connects indoor evidence with exterior conditions. The professional should begin with your timeline and photos. That context shows where the water appeared and what changed before the visit.
Inside, the pro may examine the visible pane, frame, shaft, ceiling marks, and accessible areas around the opening. Outside, the inspection should address the skylight and nearby roof as one assembly. The exact method depends on the home and conditions at the visit.
Ask the pro to distinguish observations from conclusions. “The stain starts at this corner” is an observation. “Water entered through this joint” is a conclusion that should be supported by the inspection.
The source may remain uncertain after an initial visual check. If that happens, ask what additional inspection would narrow it down. Don’t accept a precise diagnosis based only on the indoor stain when the exterior hasn’t been assessed.
A written proposal should identify the part being addressed. It should also explain whether the work is temporary, diagnostic, a targeted repair, glass replacement, or full unit replacement. Ask what portion of the surrounding roof must be opened and restored.
For homes outside Austin city limits, confirm the correct jurisdiction before structural changes begin. Bright Sky ATX serves the Austin metro across Travis, Williamson, and Hays counties, but local review isn’t handled by one shared permit desk. Cedar Park, Leander, Kyle, Austin, and other jurisdictions may follow separate processes.
Bright Sky ATX doesn’t inspect roofs or perform emergency skylight repairs. It matches homeowners with experienced, insured independent local professionals. That separation matters because the professional who inspects the home is responsible for explaining the findings, proposed work, and price directly to you.
When to call us
Call when active water, visible glazing damage, or a recurring leak needs an on-site check from an experienced skylight and daylighting professional. Call us at (737) 477-8898 and Bright Sky ATX will match you with an experienced, insured independent local pro.